In this digital world, more and more people are using PDFs to create and share signature-required documents such as contracts, legal documents, etc., making it necessary to master PDF signing skills. In this article, we will walk through the process of scanning your signature and inserting it into PDF documents, enabling you to work more efficiently with PDFs. Now, stay tuned with us and explore how to scan signatures for PDFs with our detailed guide.
How to Scan Your Physical Signature
Generally, it takes two steps to sign PDFs with a scanned signature: turning a physical signature into a scanned image and inserting signatures into PDFs. So, we will also use two sections to show you how to scan signatures for PDFs and sign with them. In this part, we will focus on the scanning signature step.
As you can learn from the name, scanning signatures requires a scanner, which helps recognize the physical paper and transform it into a scanned signature. Usually, you can rely on a smartphone scanner app or a traditional scanner that is connected to a computer to capture your signature, which depends on the device you use.
Here’s how to scan your signature for signing PDFs:
1. Prepare your signature with a clean, white sheet of paper and write down your name. It's suggested that a black pen be used to avoid smudges and generate an excellent result.
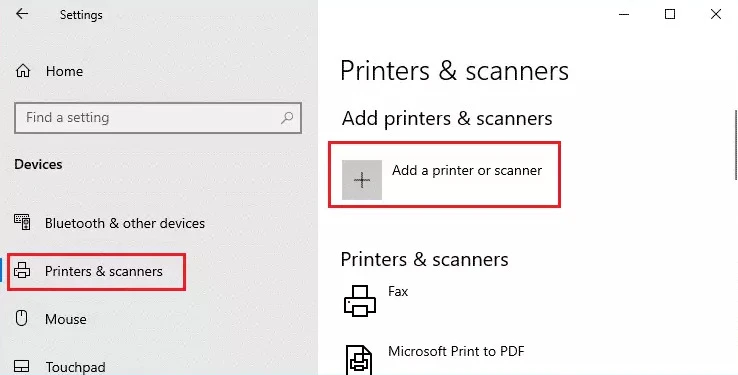
2. Launch a scanner app (for mobile phone users) or access the scanner on your computer (Settings > Printer & Scanner).

3. Place your signature on a smooth, flat surface. Make sure the signature lies in the middle of the scanner camera.
4. Scan the signature and save it as an image to your device.
That’s it! With the help of a scanner, you can effortlessly transform your physical signature into a scanned one and save it on your phone or computer. Now, after scanning signatures, let’s explore how you can add the scanned signature to your PDF documents.
How to Add a Scanned Signature to a PDF Document
To insert a scanned signature into a PDF file, you need a specialized PDF editor, which allows you to edit and sign PDF files directly.
Luckily, we know a professional PDF editor named SwifDoo PDF. It provides all-around PDF editing tools to help you manipulate PDF documents as easily as Word documents. Speaking of signing PDFs, SwifDoo PDF supports both digital signatures and electronic signatures. The latter feature allows you to upload images and sign PDFs with the signature that the image contains.
Without much ado, let’s see how you can insert a scanned signature into a PDF using SwifDoo PDF. Before we go, make sure you’ve downloaded and installed this software on your PC. If not, click the download button below to get the APK in one click.
Step 1. Launch SwifDoo PDF and open a PDF file that you need to sign.
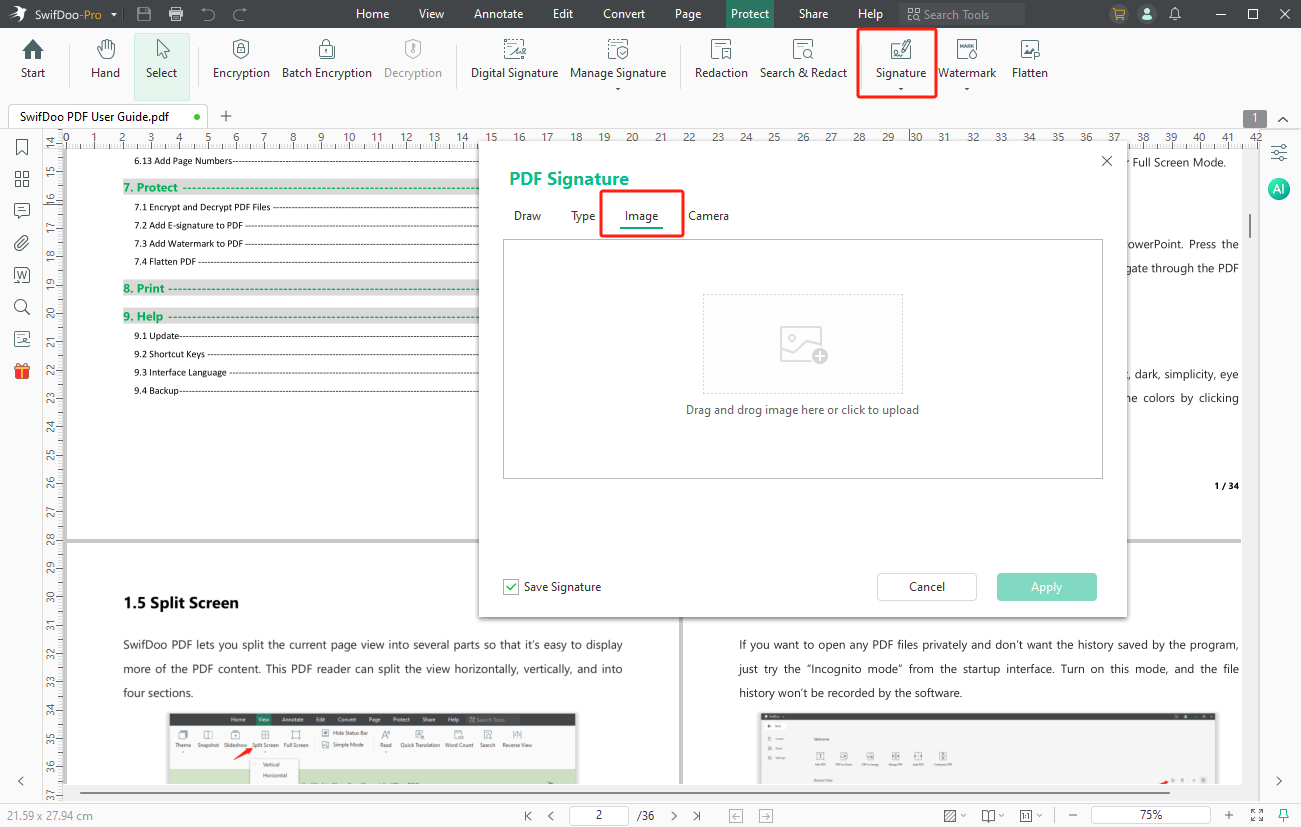
Step 2. On the top navigation bar, click Protect.
Step 3. Choose Signature > Create New Signature. This will open a PDF Signature window.
Step 4. Click Image and drop the scanned signature.

Step 5. Tap Apply to use this signature. You can drag the image to place it in the signing area. Then, save the signed PDF document.
When signing PDFs with SwifDoo PDF, all the created signatures are saved automatically, making them easy to access for future use. If you don't want the signature saved, you can also delete it at any time.
We just use SwifDoo PDF as an example to show you the process of signing PDFs with scanned signatures. If you already have a commonly used PDF software supporting document signing, you don't have to download SwifDoo PDF.
However, if you’re looking for a handy yet powerful PDF tool, don’t miss SwifDoo PDF! It can meet almost all your requirements for editing PDFs. Enjoy a seamless PDF editing experience now!

- Annotate PDFs by adding notes, bookmarks, etc.
- Convert PDFs to Word, Excel, and other editable files
- Edit, compress, organize, and split PDFs
- Sign PDFs digitally & electronically 100% safe
Easy Tips: Scan Signature for PDF with SwifDoo PDF
Have you noticed that SwifDoo PDF offers four methods to create electronic signatures when we show you how to sign PDFs in the previous section? Besides uploading images, you can also generate signatures by drawing and typing your name, as well as taking a picture through the camera. Let’s focus on the Camera tool.
What does the camera mean when creating PDF signatures? Actually, it’s easy to understand. When using the camera, SwifDoo PDF will activate your computer’s camera, which allows you to take a picture of anything, including a handwritten signature, and use it as an e-signature. By using this tool, you can avoid the scanning process and sign PDFs by photographing your handwritten signature straightforwardly.
Now, let’s check how it works:
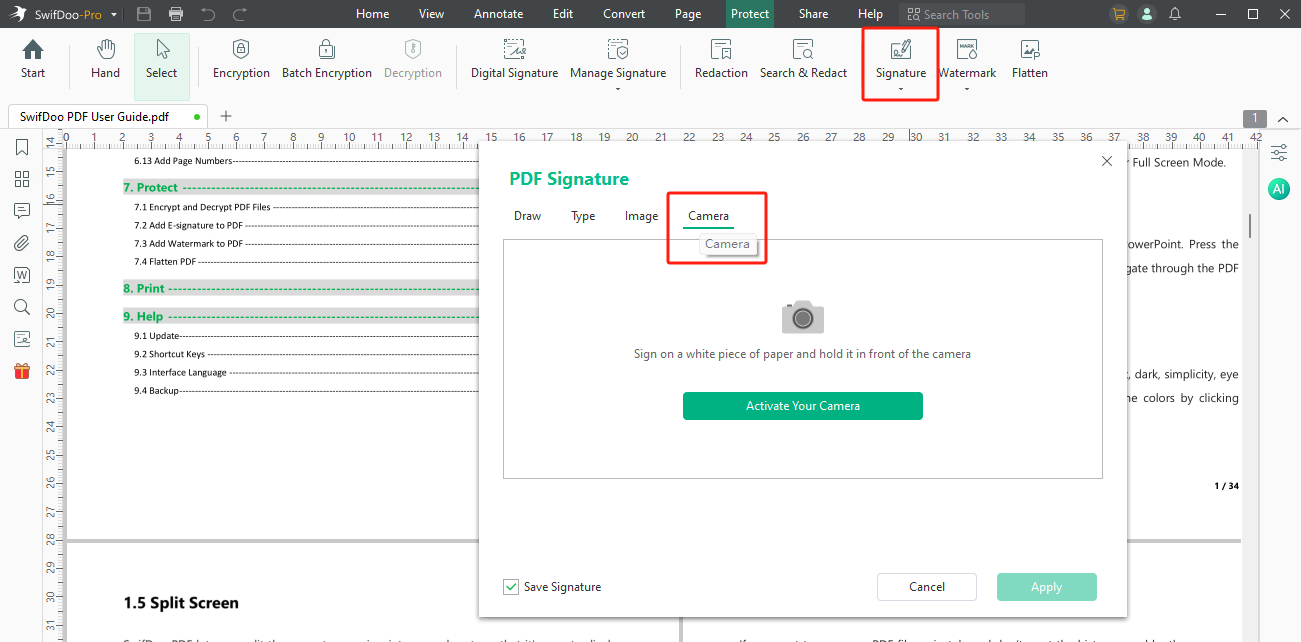
Step 1. Open a PDF file in SwifDoo PDF and click Protect on the top dashboard.
Step 2. Select Signature > Create New Signature.
Step 3. Tap Camera in the PDF Signature dialog box. Click Activate Your Camera to process.

Step 4. Sign your name on a piece of white paper and hold it in front of the camera. Then, take a picture of the signature and insert it into your document.
Step 5. Place the signature in the signing area of your PDF and save your changes.
It’s convenient to sign PDFs with SwifDoo PDF. In addition to electronic signatures, this software also supports adding digital signatures to PDF documents, which provides a more reliable way to protect PDF files. So, we highly recommend using SwifDoo PDF to process PDF files.
The Bottom Line
To sum up, with the help of a scanner and PDF signer, it’s easy to scan signatures and sign PDFs. In this article, we’ve offered you a clear guide to scan your signature and place it on your PDF documents.


