
Part 1. Crop a Picture in PowerPoint
In PowerPoint, you can trim an image's horizontal and vertical edges to save a specific area. This method helps you to trim off the outer edges of the picture. Also, you can save the image as a specific aspect ratio.
Here is how to crop a picture in PowerPoint:
Step 1. Select the picture you want to crop.
Step 2. Click the Format tab in the ribbon.
Step 3. Click the Crop button, and you will see the crop handles.
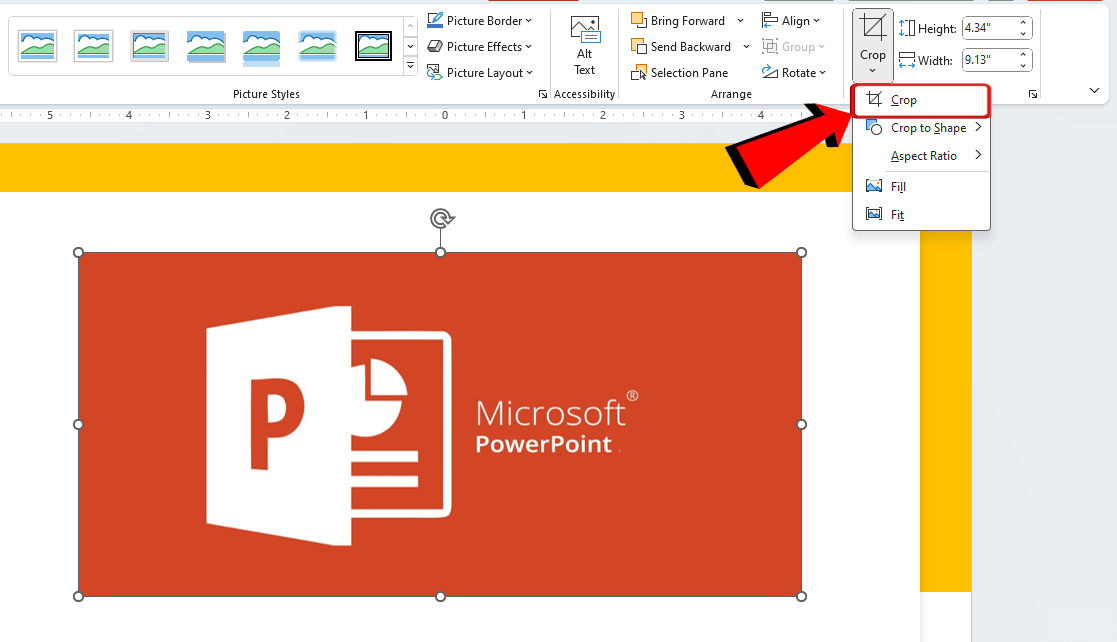
Step 4. Drag the black crop handle around the picture to adjust the area to be retained.
Step 5. Press the Enter key or click outside the picture to apply the crop. You can also click the Crop button again to complete the crop.
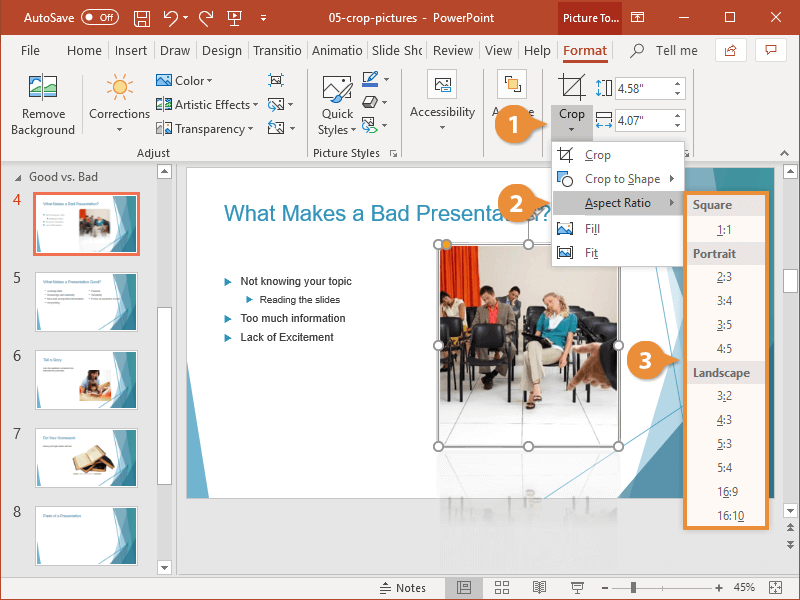
To crop the picture’s aspect ratio, follow the steps below:
- Select the picture.
- Click the Crop button.
- Choose Aspect Ration.
- Select a desired option.
- Click the Crop button again.
Part 2. Crop a Picture into a Circle in PowerPoint
“How to crop a picture into a circle in PowerPoint” is a frequently asked question. If you are also overwhelmed by this, please refer to the following steps.
Step 1. Select the picture. Then, click the Picture Format tab.
Step 2. In the Picture Format group, click the small arrow under the Crop button and choose Crop to Shape.
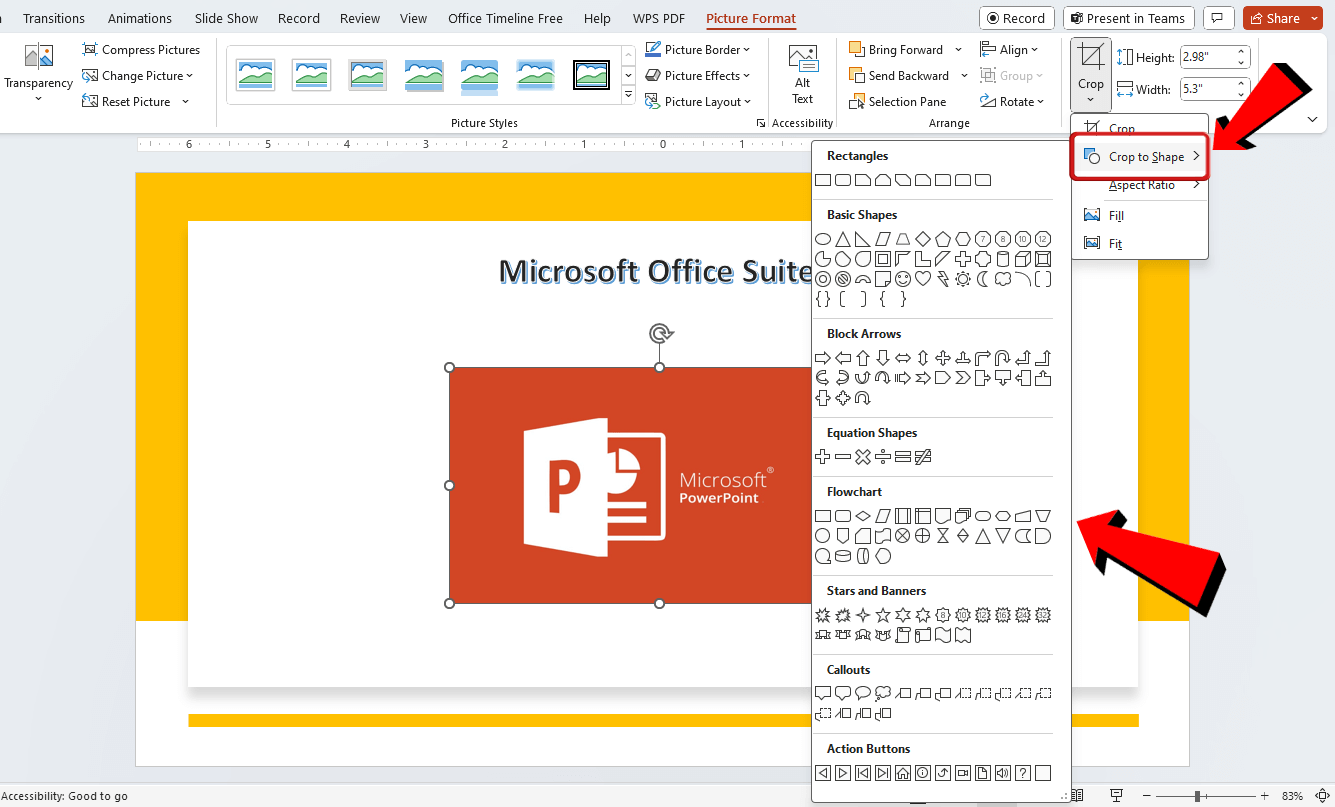
Step 3. Select the Circle shape and drag the picture to the right position.
Step 4. Press Enter or click on the outside of the image to complete the crop.
Part 3. Crop a Picture to a Custom Shape in PowerPoint
In addition to circles, you can custom crop a picture in a PowerPoint. Also, you can select a shape first and then add the picture. Read on to learn how to crop a picture in PowerPoint to a shape.
Step 1. Select the picture you want to crop. Go to the Picture Format tab.
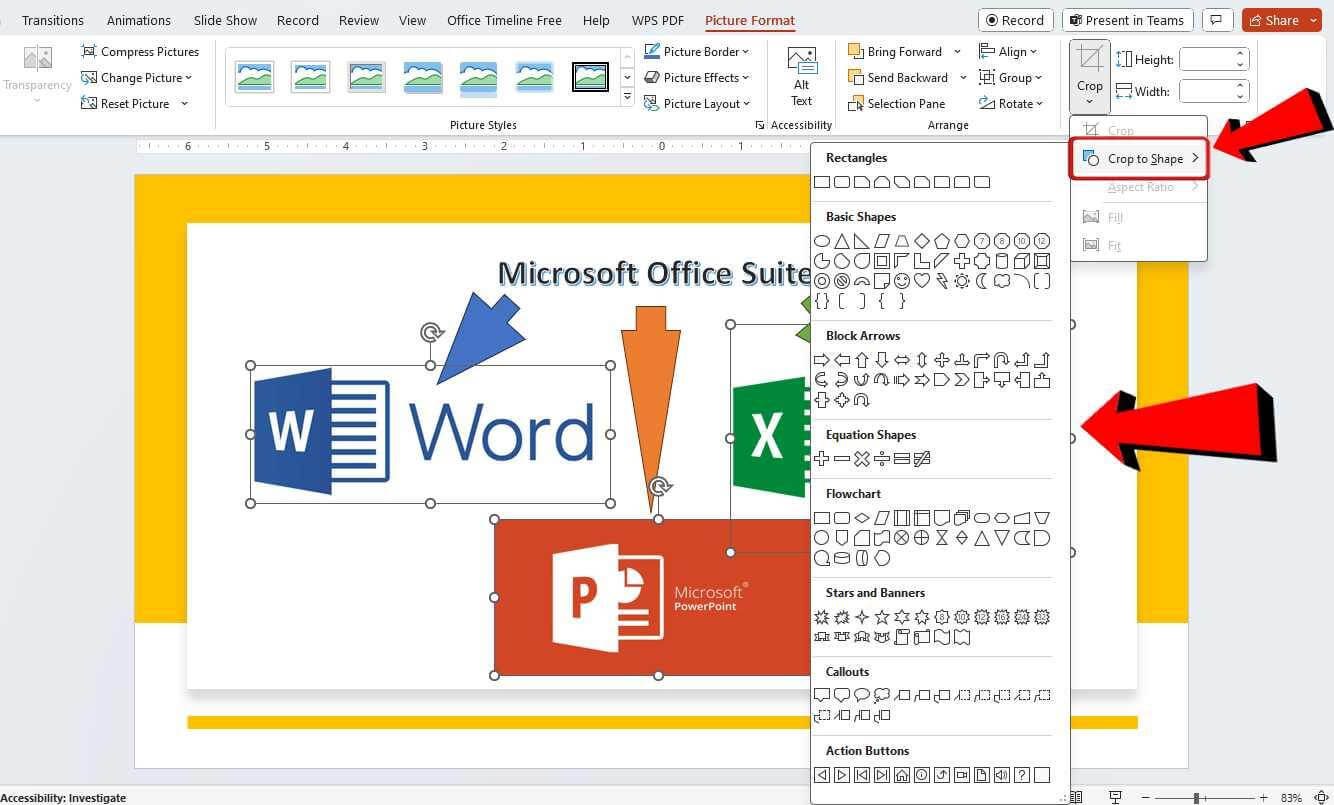
Step 2. Click on the Crop button and choose Crop to Shape.
Step 3. From the drop-down menu, choose a custom shape that fits your needs.
Step 4. Adjust the picture within the shape as needed. You can use the cropping handles to resize and reposition the image inside the shape.
Step 5. Click outside or press Enter to apply the crop.

Here’s another way to crop a picture in PowerPoint into a shape:
Step 1. Click Insert and choose Shapes. Select a shape you need.
Step 2. After that, go to Shape Format. Choose Shape Fill and select Picture.

Step 3. Select the image, and it will be added to the shape.
Step 4. You can then use Picture Format or Shape Format to adjust the picture to fit the shape.
Step 5. Click anywhere outside to confirm.
Part 4. Crop Multiple Pictures in PowerPoint
When you want to crop multiple pictures in PowerPoint, please follow the steps below.
Step 1. Select all the pictures you want to crop by holding down Ctrl and clicking on each picture.
Step 2. Go to the Picture Format tab and choose Crop.
Step 3. Select a shape you want to use. You can also use the crop handles to adjust the size of the pictures.
Step 4. PowerPoint applies the same crop to all selected pictures. When it’s OK, save the changes.

How to Present A PDF Like A PowerPoint | Quick Guide
Want to know how to present a PDF like a PowerPoint? This guide will show you 3 ways to present PDF in full screen for presentation.
READ MORE >Part 5. Bonus Tip: How to Convert PowerPoint to/from PDF
PowerPoint helps us to create presentations easily. However, PowerPoint is very easy to modify. If you want to prevent others from making changes or saving your creations, converting PPT to PDF is a good idea!
Benefits of converting PowerPoint to PDF
- Ensure that presentations look the same on all devices, regardless of software or operating system.
- Make it harder for others to edit the content, thus protecting the integrity of the presentation.
- PDF files are usually smaller than PowerPoint files, making them easier to share via email or upload online.
- PDF files are more suitable for long-term storage than PowerPoint files because they retain layout, fonts, and design more reliably.
Here is how to convert PPT to PDF without losing quality:
Step 1. Download, install, and launch SwifDoo PDF, a professional PDF tool that supports PDF conversion.
Step 2. Go to Convert and choose Office to PDF.
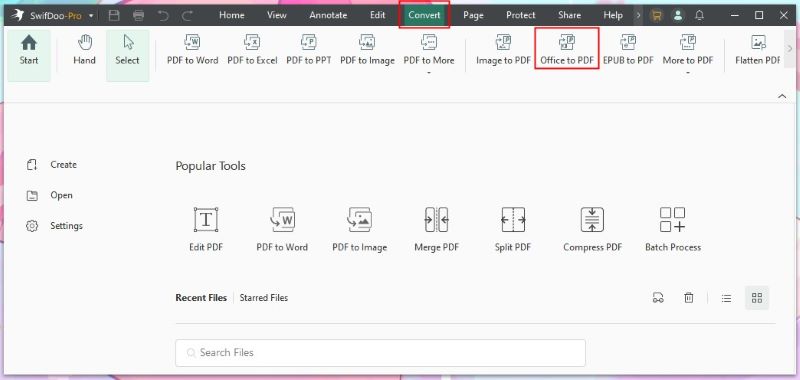
Step 3. Add the file you want to convert. Select a destination and click Start.
When the conversion is done, you can continue to edit the PDF file. It even lets you add password to lock a PDF from editing!
Conclusion
That’s all about how to crop a picture in PowerPoint. You can trim off unnecessary parts of the image or cut the image to a specific shape that fits your needs. When all edits are complete, you can utilize SwifDoo PDF to convert it to PDF for sharing and storage!


