Posters are effective solutions to promote a product, event, or service and convey key information in a visually appealing format. Mostly, it is considered that designing an eye-catching poster requires professional skills and advanced software, but you can also do it with the Microsoft Word user-friendly interface.
In this article, you will learn how to make a poster on Word, including setting up a document, customizing it with text and images, and preparing it for printing. If you are looking to print a poster as a PDF with ease, SwifDoo PDF provides a seamless solution.
Why Use Microsoft Word for Poster Design?
When we think about poster creation, Microsoft Word may not be the first option that comes to mind. However, there are many advantages of making a poster in Word:
- Microsoft Word is accessible to beginners, as most users are familiar with the software.
- Microsoft Word poster templates are the best way to create a poster, even if you have no design experience or are short on time.
- With the blank Word document, you can create pretty much any poster, such as a wanted poster.
- You can also customize the template text, color, and font style and also add personalized images to the poster.
- For a professional look, you can also customize the size and orientation of the poster.
Setting Up the Poster Dimensions
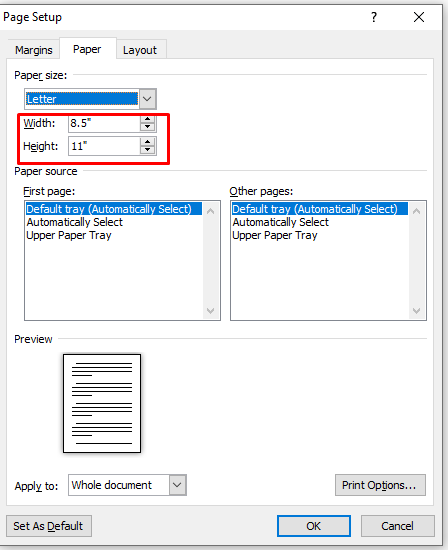
The first step to making a poster in Word is setting up the poster size. Most posters are larger than the standard letter-sized paper. So, you need to change the size of the poster manually to suit your design.
- Open a new Word document in MS Word.
- Now click on the “Layout” tab at the top of the screen.
- Click on the drop-down button next to “Size.”
- Now click on “More Paper Sizes” at the bottom of the menu.
- In the dialog box, type the poster size you need. Standard poster sizes are 18×24, 11×17, and 24×36. You can select any, or you can select custom dimensions as needed.
- You can also set the orientation of the poster(vertical or horizontal) and margins according to your needs in the layout tab.
Choose a Poster Template in Word (or Start from Scratch)
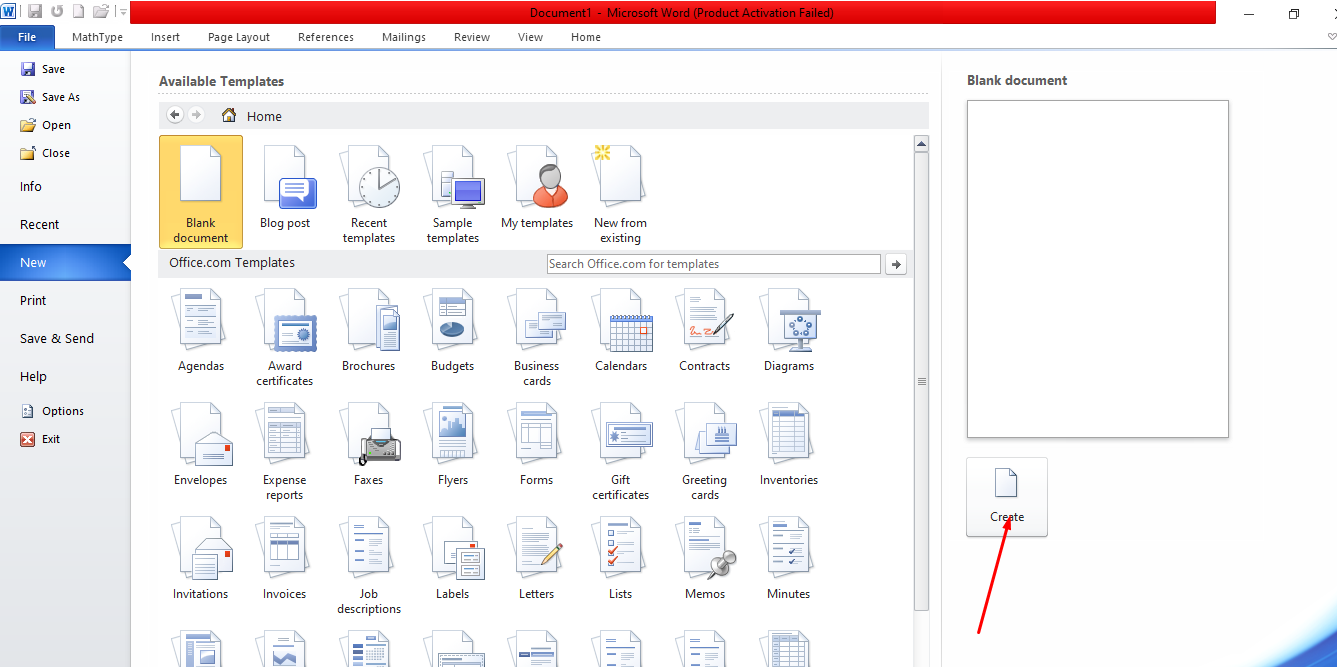
If you want to make a poster in less time, you can use the Word poster templates, which can be easily customized. To find a pre-made template in Word:
- Open the “File” menu.
- Select New and in the search bar, type “Poster.”
- Select a design you like in the available posters and click “Create.”
If you want to start from scratch, simply adjust the page dimensions as described above and begin designing your poster from a blank canvas. This option gives you full control over the design, and you can experiment with layouts and styles.
Add and Customize Text for Your Poster
Before adding text to your poster, keep in mind that your text should be eye-catching and easy to read from a distance. Here are the steps on how you can do it:
- Click on the “Insert” tab and select “text box.”
- Select “Simple Text Box” to create a space for your text.
- Type your headline, event details, or promotional message in a few lines.
- Select the text, open the home tab, and enlarge the size of the font for ease of reading.
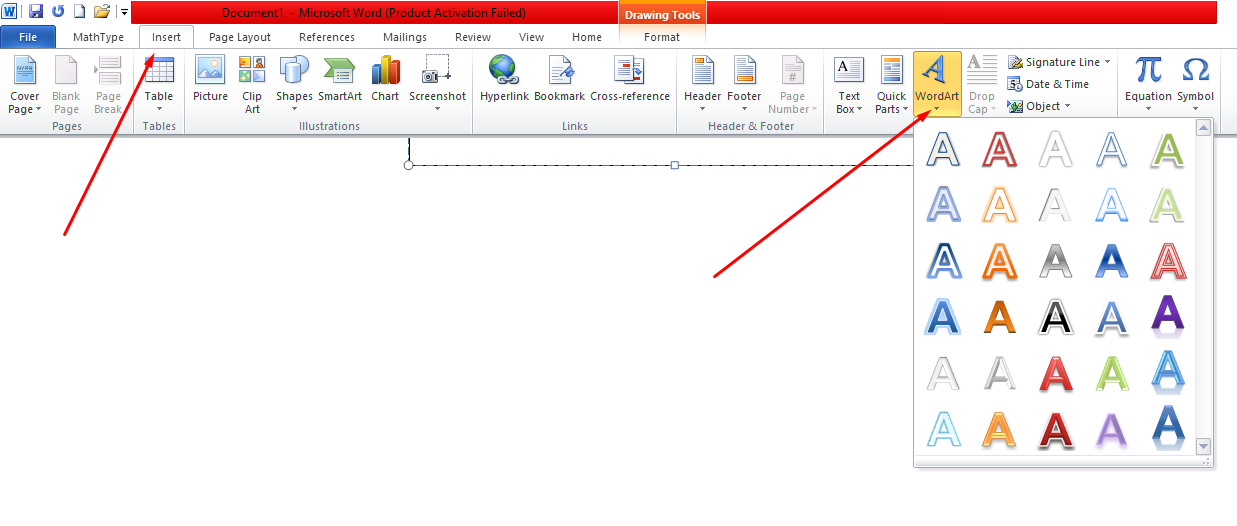
- For a catchy and colored headline, go to the Insert tab, click on “Word Art,” and add your preferred font style.
You can experiment with different fonts for different sections of your poster to create contrast and interest. Bold, italicize, or underline text to draw attention to important information, such as dates or special offers. Make sure to balance the text with ample space so your poster doesn’t appear cluttered.
Insert and Adjust Images for Posters
Images, logos, and graphics make a poster visually appealing and also complement the text. To add these elements to the poster, you have to do the following steps:
- Click on the “Insert” tab and then “Pictures.”
- Now, select an image or graphic saved on your computer that you want to add to the poster.
- Once the image is inserted, you can resize or move it by clicking and dragging its edges.
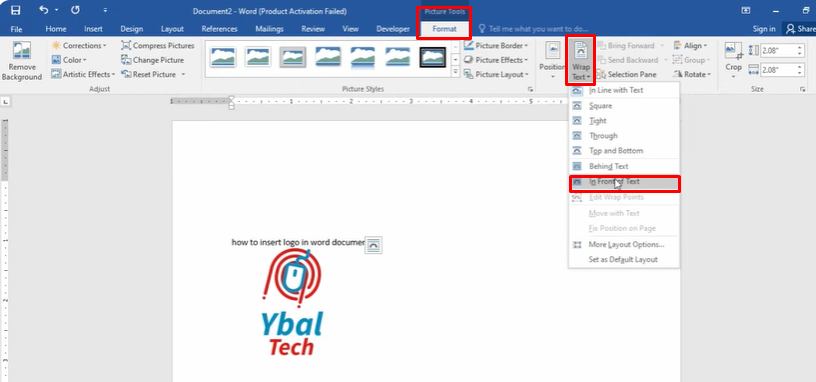
Use the “Picture Format” tab to adjust the image further. You can add borders, shadows, or other effects to make the visuals pop. You can also add the logo using the above method. For further adjustment:
- After adding the logo, click on Format >Wrap Text > In Front of Text.
- This will enable you to resize and adjust the logo at any place on the poster with the cursor.
Make sure your logos are high-quality and don’t distort when resized. Position your images, graphics, and logos thoughtfully.
Adjust Colors and Backgrounds
Colors and backgrounds enhance the poster design and make it more appealing. To add colors and backgrounds to your poster, follow the steps:
- Go to the “Layout” tab, then click on “Page Color” to choose a background color for your poster. Opt for light, neutral backgrounds if you have a lot of text or bright colors to make your poster stand out.
- If you prefer a more customized background, use the “Insert” tab to add shapes or patterns that align with your theme.
- You can also add a gradient or texture by selecting “Fill Effects” under the “Page Color” options.
- Keep your color scheme simple; 2 to 3 colors are enough to maintain a professional look.

Finalize Your Poster and Printing Tips
After completing the poster, you can see its final look before printing. By reviewing your poster, you will see if everything is fine or need more editing. To see the final look:
- Click on “File” and click on “Print Preview.”
- Double-check that all the images, texts, and other elements are aligned and that nothing is cut off the margins.
- Save your poster as a PDF so the formatting remains intact when printing. For this, click on “File,” click “Save as,” and select PDF to save the poster.
If you have larger posters, then consider printing them at professional poster shops for the best quality. If you are printing at home, then check the printer settings. The page size must be the same as the one you selected in the poster settings. You can also use SwifDoo PDF to help you print poster size in PDF.
Conclusion
With the Word pre-made templates and tools, you can make a poster efficiently and effectively. Whether you need to make a promotional poster or something better, Word has every tool you need. To create posters with PDF, use SwifDoo PDF, which offers more advanced features and a user-friendly interface.